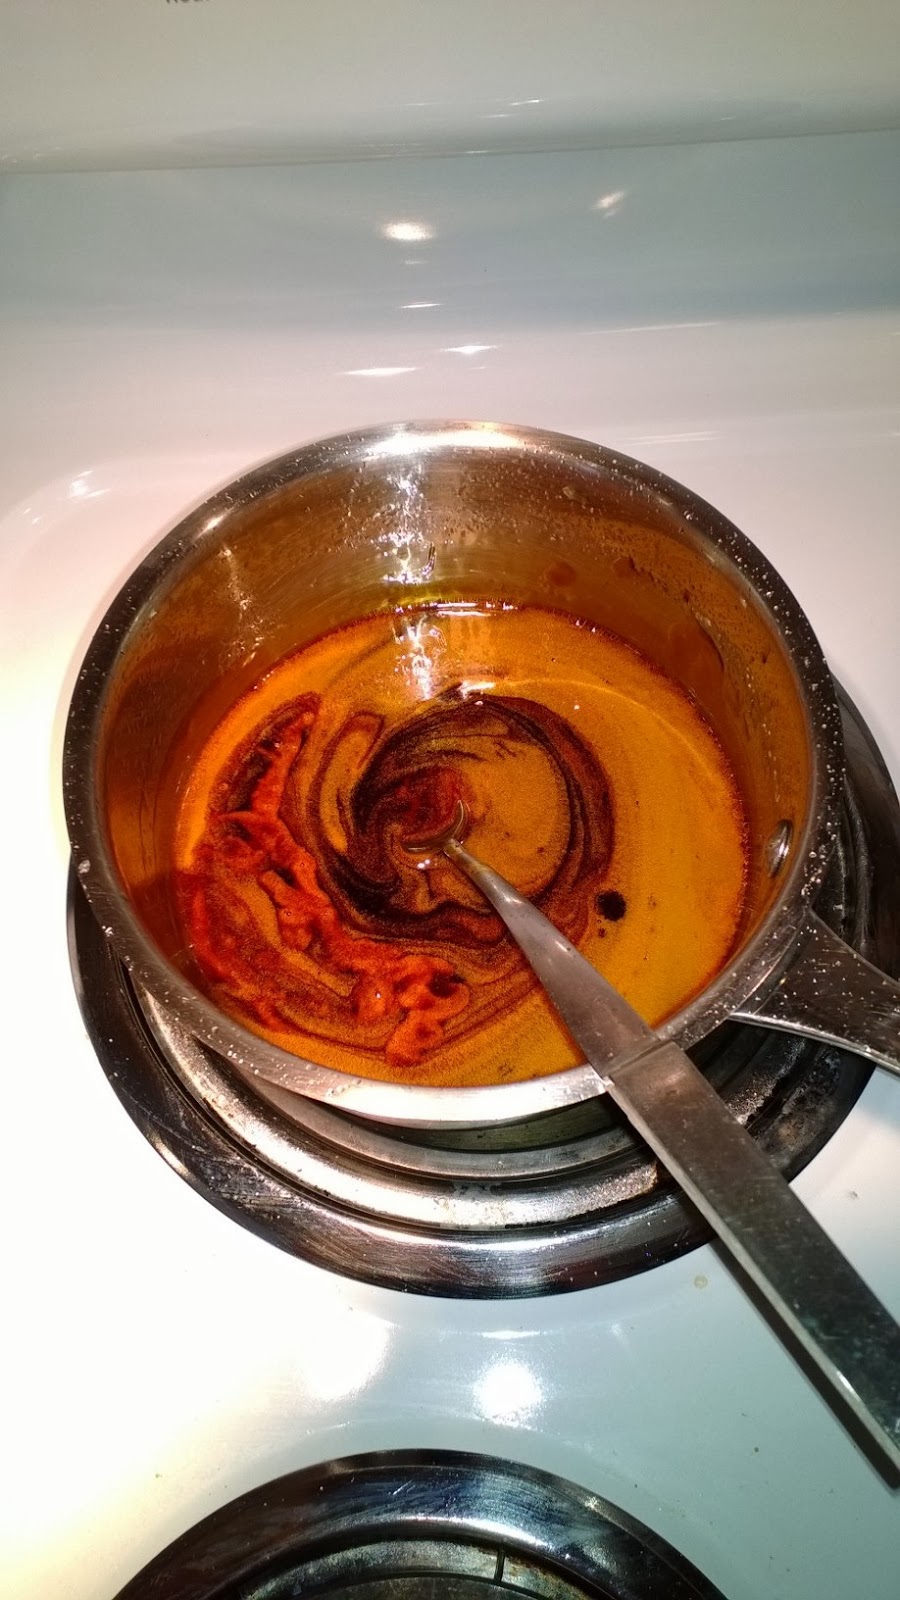
I recently received several new Kveik strains from a gentleman named Ivar in Norway. We traded some yeast that I had for several strain that he had collected.
#1 Gjernes (Voss)
#4 Muri (Olden)
#5 Hornindal (Raftevold)
#9 Ebbegarden (Stordal)
#10 Framgarden (Stordal)
#15 Nornes (Voss)
#16 Simonaitis (Joniškelis, Lithania)
#17 Midtbust (Stordal)
#22 Stalljen (Hornindal)
#38 Aurland (Aurland)
#39 Marina (Kshaushi, Russia)
#40 Rima (Kshaushi, Russia)
#43 Opshaug (Strandadalen)
I am planning on brewing with each strain over the next year and comparing the results.
I will be using a standard recipe for each batch that is made up of...
71% Pilsner
23% Munich
6% Rye
I will be doing 3 gallon batches with 10 grams of Juniper added.
The plan is to use a step mash starting at 120 for 30 minutes, 140 for 30 minutes, and 160 for 30 minutes. The wort will be boiled for 10 minutes with a small addition of hallertau added just before starting to lauter the mash.
Thursday, August 16, 2018
Thursday, August 9, 2018
Picobrew Zymatic
I recently purchased several PicoBrew Zymatic systems for the Regis Applied Craft Brewing Certificate program. These are fully automated hot-side brewing systems for homebrewing. The systems have a lot of awesome features, you can manage the mashing cycle from your phone, have it run while you are gone, and have precise temperature control.
I decided to take one of them for a test drive and see how it performed.
The system shipped in three boxes and is rather heavy, I was hoping that it would be a little more mobile than it is. If you were pulling it into and out of storage a lot it would be a bit of a pain. The boxes included a keg, the outside system, and the insert for the system full of all the miscellaneous pieces. I was pretty excited to see that it also came with a recipe kit so that you could start brewing as soon as you opened the box.
The system was very easy to get set up and had you start by running a simple cleaning cycle. A few more pictures would have been nice in the user guide, but is was pretty simple to figure out how everything went together.
After the cleaning cycle had ended I loaded up the insert with the grain and the hops that came in the kit. This was all very straightforward but made one draw back very clear. You are limited to brewing 2.5 gallons of beer in a time. Not a huge issue for me as I usually brew smaller batches anyways. However, for $2,000 being limited to 2.5 gallons at a time is kind of a downer.
I set the system up, made my water additions in the keg, and fired everything up. Since the system is fully automated I decided I should be fine to go and paint the outside of my house. I came back in after about an hour and noticed that there was a slow drip in the system somewhere. I tried pushing the insert farther back but that did not make a difference. I ended up with a bucket under the system as it slowly dripped the rest of the brew.
It was very cool to be able to pull up the system while I was painting outside and see the progress. There is a chart that is slowly constructed as the brew occurs that highlights when you move to boiling and hop additions are made.
After the boil finished the beer has to be cooled down. Here was another let down of the system. Even after paying $2,000 you have to figure out how to cool the wort. There is no heat-exchanger included. I ended up sticking the keg (that now contained all the wort) into a bucket of ice to cool down. In the future I am going to try to hook up a heat-exchanger inline so that I can avoid this issue.
After the beer cooled down, I added the yeast and placed the keg into my fridge with a temp controller set at 65F. In a week or so I should be able to transfer it and bottle it up.
I later went and played with the online recipe creator. It is cool for someone who always follows the rules. However, for an advanced brewer there are a lot of limitations. For one, you can only pick from a limited catalog of yeast to add to the beer, and it forces you to pick from one on the list instead of being able to add your own. This was particularly frustrating for me who likes to play around with yeast! There were also only 4 water addition options and you had to use teaspoons as the value, so anyone who wants to use grams is out of luck.
Overall it is a cool piece of equipment. I am looking forward to the precise temperature control and hopping additions that I will be able to set. I also really like that you can run a rinse and a cleaning procedure on the equipment. The 2.5 gallon limitation will likely be a downer for some people, but it does not really matter all that much to me. What I would like to see changed is the online recipe builder. It needs to include more options for building out your recipe.
I decided to take one of them for a test drive and see how it performed.
The system shipped in three boxes and is rather heavy, I was hoping that it would be a little more mobile than it is. If you were pulling it into and out of storage a lot it would be a bit of a pain. The boxes included a keg, the outside system, and the insert for the system full of all the miscellaneous pieces. I was pretty excited to see that it also came with a recipe kit so that you could start brewing as soon as you opened the box.
The system was very easy to get set up and had you start by running a simple cleaning cycle. A few more pictures would have been nice in the user guide, but is was pretty simple to figure out how everything went together.
After the cleaning cycle had ended I loaded up the insert with the grain and the hops that came in the kit. This was all very straightforward but made one draw back very clear. You are limited to brewing 2.5 gallons of beer in a time. Not a huge issue for me as I usually brew smaller batches anyways. However, for $2,000 being limited to 2.5 gallons at a time is kind of a downer.
I set the system up, made my water additions in the keg, and fired everything up. Since the system is fully automated I decided I should be fine to go and paint the outside of my house. I came back in after about an hour and noticed that there was a slow drip in the system somewhere. I tried pushing the insert farther back but that did not make a difference. I ended up with a bucket under the system as it slowly dripped the rest of the brew.
It was very cool to be able to pull up the system while I was painting outside and see the progress. There is a chart that is slowly constructed as the brew occurs that highlights when you move to boiling and hop additions are made.After the boil finished the beer has to be cooled down. Here was another let down of the system. Even after paying $2,000 you have to figure out how to cool the wort. There is no heat-exchanger included. I ended up sticking the keg (that now contained all the wort) into a bucket of ice to cool down. In the future I am going to try to hook up a heat-exchanger inline so that I can avoid this issue.
After the beer cooled down, I added the yeast and placed the keg into my fridge with a temp controller set at 65F. In a week or so I should be able to transfer it and bottle it up.
I later went and played with the online recipe creator. It is cool for someone who always follows the rules. However, for an advanced brewer there are a lot of limitations. For one, you can only pick from a limited catalog of yeast to add to the beer, and it forces you to pick from one on the list instead of being able to add your own. This was particularly frustrating for me who likes to play around with yeast! There were also only 4 water addition options and you had to use teaspoons as the value, so anyone who wants to use grams is out of luck.
Overall it is a cool piece of equipment. I am looking forward to the precise temperature control and hopping additions that I will be able to set. I also really like that you can run a rinse and a cleaning procedure on the equipment. The 2.5 gallon limitation will likely be a downer for some people, but it does not really matter all that much to me. What I would like to see changed is the online recipe builder. It needs to include more options for building out your recipe.
Friday, June 5, 2015
BJCP Exam
I recently passed the BJCP exam (right before the new guidelines came out). I thought I might write a short post based on how the test went in case anyone else is thinking of taking the exam.
The first part of the process is to pass the online multiple choice exam. It is a 200 question open book timed exam. I thought that the test would be a lot harder than it was. I picked the option of paying $20 to take the test 3 times instead of $10 per time figuring I would not pass the first time and need to take it again after some additional studying. As it turns out I passed on the first attempt. If you know a decent amount about the geography of beer and fermentation you will do fine. For example, English styles of beer use English hops and yeast that are generally fruity, somewhat sweet, and produce byproducts such as diacetyl. So when a question asks "What is the hop characteristic of such and such ENGLISH BEER STYLE" the answer is going to be floral/spicy. If the question is asking about an American style of beer the answer is going to fit American characteristics (Piney/Citrus hops, clean fermentation profile, etc.). If you don't know anything about a certain style, say Bock, as long as you know the beer style is from around Germany you know that it should have German hops, German malt profile, and German fermentation characteristics. By knowing about what ingredients are located where you automatically know a lot about the beers in that area.
After passing the online exam you can now take the in-person part of the exam. The consists of tasting 6 beers and filling out judging sheets for them. You do not get to use the style guide while you are tasting the beers. Your score is then compared to that of three judges who are also tasting the exact same beers. The result is based on how closely you scored the beers to the professional judges with some leniency if the majority of the people taking the test disagree with the professional judges.
The first beer was a German Pils, it ended up being my best review for the exam.
The second beer I tasted was a Cream Ale. I was certain that it had been spiked with DMS as it tasted terrible. I scored the beer low as did most the people I spoke with after the exam. It turned out the beer was a gold medal winning beer at GABF. I assume this is where I lost the majority of my points. It is a little frustrating that the professional beer judges get to take the exam with the tasting guidelines and confer with each other as they take notes.
Third beer was a Northern English Brown, I learned later that it was Ellie's Brown Dog Ale from Avery. I scored the beer well and mentioned that it would fit better in an American Brown Ale category.
Forth beer was an American Pale Ale (Dale's Pale Ale). I scored well on this beer and it was a very enjoyable sample.
Fifth beer was a Belgian Golden Strong (New Belgium's Trippel). I missed some points here but did note that the beer would be better placed in the Tripel category because it lacked the fruitiness of a Golden Strong.
Sixth beer was a Robust Porter (a home brew). This was my second lowest scoring beer. My remarks apparently disagreed with those of the professional judges.
What I learned is that several of the beers were really high quality beers (Trippel, Dale's, Ellie's Brown Dog) entered into the wrong category to see if you could identify what was required for the category. Being forced to take the exam without the style guidelines requires you to really know your stuff. I did not score low in any of the five area (Perceptive Accuracy, Descriptive Ability, Feedback, Completeness, Scoring Accuracy) but rather did poorly on two of the beers (Cream Ale and Robust Porter). I am not all that surprised as I have never had a Cream Ale before and do not drink much porter let alone compare it to Stout and Brown Porter. In order to improve my score I simply need to drink and review more beer!
Overall my final score was a 74, I would have liked a higher score but it will at least allow me to achieve the "Certified" rank after I have some judging points.
The first part of the process is to pass the online multiple choice exam. It is a 200 question open book timed exam. I thought that the test would be a lot harder than it was. I picked the option of paying $20 to take the test 3 times instead of $10 per time figuring I would not pass the first time and need to take it again after some additional studying. As it turns out I passed on the first attempt. If you know a decent amount about the geography of beer and fermentation you will do fine. For example, English styles of beer use English hops and yeast that are generally fruity, somewhat sweet, and produce byproducts such as diacetyl. So when a question asks "What is the hop characteristic of such and such ENGLISH BEER STYLE" the answer is going to be floral/spicy. If the question is asking about an American style of beer the answer is going to fit American characteristics (Piney/Citrus hops, clean fermentation profile, etc.). If you don't know anything about a certain style, say Bock, as long as you know the beer style is from around Germany you know that it should have German hops, German malt profile, and German fermentation characteristics. By knowing about what ingredients are located where you automatically know a lot about the beers in that area.
After passing the online exam you can now take the in-person part of the exam. The consists of tasting 6 beers and filling out judging sheets for them. You do not get to use the style guide while you are tasting the beers. Your score is then compared to that of three judges who are also tasting the exact same beers. The result is based on how closely you scored the beers to the professional judges with some leniency if the majority of the people taking the test disagree with the professional judges.
The first beer was a German Pils, it ended up being my best review for the exam.
The second beer I tasted was a Cream Ale. I was certain that it had been spiked with DMS as it tasted terrible. I scored the beer low as did most the people I spoke with after the exam. It turned out the beer was a gold medal winning beer at GABF. I assume this is where I lost the majority of my points. It is a little frustrating that the professional beer judges get to take the exam with the tasting guidelines and confer with each other as they take notes.
Third beer was a Northern English Brown, I learned later that it was Ellie's Brown Dog Ale from Avery. I scored the beer well and mentioned that it would fit better in an American Brown Ale category.
Forth beer was an American Pale Ale (Dale's Pale Ale). I scored well on this beer and it was a very enjoyable sample.
Fifth beer was a Belgian Golden Strong (New Belgium's Trippel). I missed some points here but did note that the beer would be better placed in the Tripel category because it lacked the fruitiness of a Golden Strong.
Sixth beer was a Robust Porter (a home brew). This was my second lowest scoring beer. My remarks apparently disagreed with those of the professional judges.
What I learned is that several of the beers were really high quality beers (Trippel, Dale's, Ellie's Brown Dog) entered into the wrong category to see if you could identify what was required for the category. Being forced to take the exam without the style guidelines requires you to really know your stuff. I did not score low in any of the five area (Perceptive Accuracy, Descriptive Ability, Feedback, Completeness, Scoring Accuracy) but rather did poorly on two of the beers (Cream Ale and Robust Porter). I am not all that surprised as I have never had a Cream Ale before and do not drink much porter let alone compare it to Stout and Brown Porter. In order to improve my score I simply need to drink and review more beer!
Overall my final score was a 74, I would have liked a higher score but it will at least allow me to achieve the "Certified" rank after I have some judging points.
Saturday, March 28, 2015
Belgian Beer History: Peter Bouckaert
I had the pleasure last week of listing to a lecture by Peter Bouckaert, the Brewmaster at New Belgium, on Belgian Beer History. I thought I should write down some of the key points he made before I forgot.
He started by having everyone shout out what their own impression of Belgian Beer was. He got responses like "Trapist", "Sour", "Wild", "High Alcohol", etc. He then pointed out that in reality the majority of the beer made in Belgium is pilsner. In addition he mentioned that ~10% of the market is "beer for kids" and had us taste Avril, a Dupont table beer. A style traditionally made from the last runnings.
Peter went on to talk about the history of beer in Belgium and the surrounding area, all information that you could read about elsewhere. What I want to record are some side notes that he made.
He started by having everyone shout out what their own impression of Belgian Beer was. He got responses like "Trapist", "Sour", "Wild", "High Alcohol", etc. He then pointed out that in reality the majority of the beer made in Belgium is pilsner. In addition he mentioned that ~10% of the market is "beer for kids" and had us taste Avril, a Dupont table beer. A style traditionally made from the last runnings.
Peter went on to talk about the history of beer in Belgium and the surrounding area, all information that you could read about elsewhere. What I want to record are some side notes that he made.
- American Malt is too high in protein. This came about because the Macro Brewers need all that protein so that when they cut their wort with corn and rice there is still enough Free Amino Nitrogen (FAN) and enzymes to convert the starch. He mentioned that the protein is too high to make a big beer without needing to add sugar.
- 1554 is actually from a 1447 book and by the sounds of it only loosely based on what was found in the book, he even had to decide if it should have hops or not.
- Peter's Reinheitsgebot has only 3 ingredients, Experience, Knowledge, and Creativity
- American brewers should not use the word Lambic, it takes away for the authenticity of real Lambics.
- Keep beers simple, he showed a panel for a trapist brewery with 3 buttons, one for each of the beers that they make. The irony is how complicated the beers are from such a simple process.
Thursday, March 12, 2015
Triple Chocolate Coffee Milk Stout
Winter is in full swing in Colorado. We just set a record for February snow fall and the temp is 15 F outside. Know what that means? Time for some Stout! I was talking with my buddy John and we were both reminiscing about a Chocolate Stout he had brewed last year. He also mentioned that he had coffee from a local rooster, Coda Coffee. With that in mind we set out to brew a Chocolate Coffee Milk Stout. The only problem was deciding what yeast we wanted to use. Last year the Stout was brewed with Ringwood yeast, which I personally hate because of the aromas it produces in the finished product. Long story short we decided to brew a 12 gallon batch and split it into 3 carboys with 3 different yeast strains, and so Triple Chocolate Coffee Milk Stout was born!The recipe was the same as last year but with a bigger batch size.
![]() |
| 2 of the 3 strains we were using |
Recipe:
OG: 1.050
Grains:
15 pounds 2-Row Base Malt
2.5 pounds Chocolate Malt
1 pound Flaked Barley
Hops:
2 oz East Goldings @ 30 minutes
Yeast (Bought from local company Inland Island)
INISBC-361: Continental (Ringwood)
INISBC-315: English Ale V (Listed as good for ESBs)
INISBC-316: English Ale VI (Not sure but has to be better than Ringwood!!)
![]() |
| At 14 hours all three were already fermenting away. |
Tuesday, October 28, 2014
Pumpkin Beer 2014
It has been an unusually long and warm fall in Colorado. The leaves are slowly falling from the trees, the temperature is still in the high 70s, and it is the perfect time of the year to brew a pumpkin beer. If everything goes as planned I should have carbonated bottles by the time Thanksgiving is here to share with family and friends.
I have been using a similar recipe for several years now, about 90% pale malt and 10% 20L caramel malt. This gives the beer a nice orange color. I also add 3 pounds of pumpkin for a 5 pound batch to the mash. In the past I have always toasted the pumpkin in the oven before adding it to caramelize it. For spice I add 1/2 tsp of pumpkin pie spice per gallon of wort 5 minutes before the end of boil. This level of spicing is slightly less than I would like so I add some vanilla and additional spices right before bottling.
This year I decided I wanted to mix things up a bit and deviated from past years. I happened to have some molasses on hand and wanted to experiment with adding some to the boil for both color and flavor. I also had some fresh cascade hops picked by a friend that I hope will make a nice addition to the beer.
The recipe that I settled on looked like this.
3 gallons
6 pounds Pale 2 Row
1/3 pound special "B"
1 pound molasses
2 pounds toasted pumpkin
1 oz Fuggles at 60 minutes
1 oz home grown Cascade at 15 minutes
1 1/2 tsp pumpkin pie spice at 5 minutes
1 vial of Inland Island Oregon IPA Yeast
I mashed the pumpkin with all of the grain at 148 F for an hour with a batch sparge for 20 minutes at 175 F. The molasses was added at the start of boil.
Update 10/27/2014
12 hours in fermentation is raging, yeast took right off.
I have been using a similar recipe for several years now, about 90% pale malt and 10% 20L caramel malt. This gives the beer a nice orange color. I also add 3 pounds of pumpkin for a 5 pound batch to the mash. In the past I have always toasted the pumpkin in the oven before adding it to caramelize it. For spice I add 1/2 tsp of pumpkin pie spice per gallon of wort 5 minutes before the end of boil. This level of spicing is slightly less than I would like so I add some vanilla and additional spices right before bottling.
This year I decided I wanted to mix things up a bit and deviated from past years. I happened to have some molasses on hand and wanted to experiment with adding some to the boil for both color and flavor. I also had some fresh cascade hops picked by a friend that I hope will make a nice addition to the beer.
The recipe that I settled on looked like this.
3 gallons
6 pounds Pale 2 Row
1/3 pound special "B"
1 pound molasses
2 pounds toasted pumpkin
1 oz Fuggles at 60 minutes
1 oz home grown Cascade at 15 minutes
1 1/2 tsp pumpkin pie spice at 5 minutes
1 vial of Inland Island Oregon IPA Yeast
I mashed the pumpkin with all of the grain at 148 F for an hour with a batch sparge for 20 minutes at 175 F. The molasses was added at the start of boil.
Update 10/27/2014
12 hours in fermentation is raging, yeast took right off.
Sunday, March 30, 2014
Baby's Barleywine Ale
3/30/2014
My wife and I recently welcomed a new addition to our family, a beautiful little girl. In celebration of her birth I brewed a Barleywine to share with friends and family and a few extra to age for when she is older. I based the beer on a past recipe "Barley Wine 2012" which turned out fantastic. It was so good in fact that the bottles I intended to age ended up in my belly before the year was out. Using this recipe as a guideline I decided to up the roast, toffee, and chocolate and dial back on the hops to make it more of an English Style Barleywine. I also wanted to test out a yeast blend that I had acquired to the Brewing Science Institute labeled BSI-85. The blend includes a variety of English ale strains to create a diverse ester profile and California Ale Yeast to make sure that the fermentation does not stall out.
This is the recipe that I settled on:
Grain Bill:
71% Maris Otter
11.5 % Malted Wheat
7% Caramel 60
7% Caramel 80
3.5% Special "B"
Hops:
90 minutes Magnum 32 IBU
30 minutes Magnum 21 IBU
5 minutes Challenger 5.5 IBU
I mashed at 148 F for an hour to create a highly digestible wort
Starting Gravity 1.088
Final Gravity 1.020
ABV ~10%
Pitched BSI-85
Primary Fermentation 2 weeks
Seconday 3 months at 65 F
Aged 3 months at 50 F
Bottled with table sugar and fresh yeast
Tasting Notes:
Beer turned out great, carbonation is subtle which really lets all the flavors come through the beer as well as the body. Sweet and warming, well balanced at the finish. The roast really comes through as does the caramel, toffee, and chocolate.
My wife and I recently welcomed a new addition to our family, a beautiful little girl. In celebration of her birth I brewed a Barleywine to share with friends and family and a few extra to age for when she is older. I based the beer on a past recipe "Barley Wine 2012" which turned out fantastic. It was so good in fact that the bottles I intended to age ended up in my belly before the year was out. Using this recipe as a guideline I decided to up the roast, toffee, and chocolate and dial back on the hops to make it more of an English Style Barleywine. I also wanted to test out a yeast blend that I had acquired to the Brewing Science Institute labeled BSI-85. The blend includes a variety of English ale strains to create a diverse ester profile and California Ale Yeast to make sure that the fermentation does not stall out.
This is the recipe that I settled on:
Grain Bill:71% Maris Otter
11.5 % Malted Wheat
7% Caramel 60
7% Caramel 80
3.5% Special "B"
Hops:
90 minutes Magnum 32 IBU
30 minutes Magnum 21 IBU
5 minutes Challenger 5.5 IBU
I mashed at 148 F for an hour to create a highly digestible wort
Starting Gravity 1.088
Final Gravity 1.020
ABV ~10%
Pitched BSI-85
Primary Fermentation 2 weeks
Seconday 3 months at 65 F
Aged 3 months at 50 F
Bottled with table sugar and fresh yeast
Tasting Notes:
Beer turned out great, carbonation is subtle which really lets all the flavors come through the beer as well as the body. Sweet and warming, well balanced at the finish. The roast really comes through as does the caramel, toffee, and chocolate.
Sunday, March 2, 2014
Rocky Mountain Microbrewing Sympossium 2014
It is that time of year again!
For the past 4 years I have been lucky enough to attend the Rocky Mountain Microbrewing Sympossium. It is a get together for any brewers in the Rocky Mountain region and the day is spent listening to presentations from leaders in the industry, drinking beer, and net working.
This year presentations were given about malting, setting up a sensory analysis program, marketing, Crafting A Nation, brewing lager beer, and hop utilization. I thought I would share a couple of the tips I picked up this year from two of the presentations.
1) Brewing Lager Beer: The Slow and Expensive Way -Ashleigh Carter
For the past 4 years I have been lucky enough to attend the Rocky Mountain Microbrewing Sympossium. It is a get together for any brewers in the Rocky Mountain region and the day is spent listening to presentations from leaders in the industry, drinking beer, and net working.This year presentations were given about malting, setting up a sensory analysis program, marketing, Crafting A Nation, brewing lager beer, and hop utilization. I thought I would share a couple of the tips I picked up this year from two of the presentations.
1) Brewing Lager Beer: The Slow and Expensive Way -Ashleigh Carter
- Ashleigh is an experienced brewer who has worked at both Dry Dock and Prost. She travels regularly to Germany and knows more about German beer than almost anyone I know. Her talk focused on brewing Lager beer in a traditional fashion. She recommended a few things...
- All Lager beer can be made with 5 malts and 2 hops, but for any one beer in the style you should only be using 3 malts and 1 hop at most.
- pH is very, very important, and here are her recommendations. Mash (5.2-5.5), Begin Boil (5.2-5.5), End Boil (5.0-5.2), End Fermentation (4.2-4.4)
- A thinner mash is better (in particular for decocting), she recommended 4:1 to 5:1 liters:kilograms
- Mash long and low (temp 145-148)
- Boil no less than 90 minutes (Colorado Altitude)
- Knockout cold
- If you need to make a water adjustment add CaCl2 at 50-100 ppm
- I have gotten to hear several talks from the folks at AC Golden in the past. They always do a great job of presenting data to back up what they are saying. They also have all the cool toys to analyze their beer and the opportunity to play around with recipes and ingredients. The topic this year was hop utilization and how perceived bitterness relates to measured IBUs.
- The rule that we have all been taught is that you have to boil hops in order to isomerize the Alpha Acids and add any bitterness to your beer. The guys from AC Golden blew that out of the water with their presentation. They tested different conditions and how they effected IBUs measured by HPLC or Spectophotometery. According to their results IBUs were increased in the whirl pool, mash hopping, and first wort hopping. All times when hops should not have been able to isomerize. This shakes the very foundation of hopping!
- The second half of the presentation looks at increasing IBUs in homebrews that were dry hopped. They tested three sets of homebrewed beer before and after dry hopping. Each time the IAA (Isomerized Alpha Acids) increased, some by 25%, just through dry hopping. The data is still preliminary but I am going to follow up with Jason when he has all the results in.
Sunday, February 23, 2014
Solera: Perpetuum
2/23/2014
Two years ago a couple of my friends and I raised money on kick starter to brew beer, buy barrels, and age sour beer. Last summer we had two release parties and had a great experience sharing our creations with fellow beer enthusiasts. Although the group that was responsible for the project have all moved on, some of that beer is still left in the form of a Solera. For the first time I will be pulling from the Solera and adding back fresh wort. Before I get to that let me tell you a little bit about what a Solera is and how this particular one came about.
From Wikipedia:
No container is ever drained, so some of the earlier product always remains in each container. This remnant diminishes to a tiny level, but there can be significant traces of product much older than the average, depending on the transfer fraction. In theory traces of the very first product placed in the solera may be present even after 50 or 100 cycles."
As you can see the concept is pretty basic, you take a portion of the old beer out and make up the difference with new beer. In this case I only have a single barrel that is being aged. The barrel came about when the Wild Brewing team was bottling 90 gallons of beer. We came down to the last 5 gallons in the first two barrels and decided to put them into carboys so that they would settle out (the yeast cake was kicked up in trying to get out all the beer). When we came to the final barrel we found out we did not have enough bottles and had to leave 15 gallons of beer in the barrel. I was uncomfortable leaving the barrel half empty and so we topped it off with the 5 gallons from the other two barrels and 5 gallons of fresh beer. That brought the barrel back up to 30 gallons with a mixture of 15 gallons of Cherry Saison, 5 gallons of Flanders Red, 5 gallons of a Pale Sour, and 5 gallons of something resembling an all Brett Wit. Since that time the barrel has been topped up with extra wort from several batches of beer, mostly sour or all Brett beers. At this point it has an impressive amount of microflora both from batches of beer, the original inoculum, and several sets of bottle dregs. Here is a list of just the microbes added through beer additions.
I tasted the solera beer at the time I was moving it and it was very tasty! A nice round sourness and a whole lot of fruit in the nose. It was a light red color which I hope to darken up by adding darker beers in the future. In about 6 months I will take out 5 gallons and bottle it and freshen the barrel with new beer.
Two years ago a couple of my friends and I raised money on kick starter to brew beer, buy barrels, and age sour beer. Last summer we had two release parties and had a great experience sharing our creations with fellow beer enthusiasts. Although the group that was responsible for the project have all moved on, some of that beer is still left in the form of a Solera. For the first time I will be pulling from the Solera and adding back fresh wort. Before I get to that let me tell you a little bit about what a Solera is and how this particular one came about.
From Wikipedia:
"In the solera process, a succession of containers are filled with the product over a series of equal aging intervals (usually a year). One container is filled for each interval. At the end of the interval after the last container is filled, the oldest container in thesolera is tapped for part of its content, which is bottled. Then that container is refilled from the next oldest container, and that one in succession from the second-oldest, down to the youngest container, which is refilled with new product. This procedure is repeated at the end of each aging interval. The transferred product mixes with the older product in the next barrel.
No container is ever drained, so some of the earlier product always remains in each container. This remnant diminishes to a tiny level, but there can be significant traces of product much older than the average, depending on the transfer fraction. In theory traces of the very first product placed in the solera may be present even after 50 or 100 cycles."
- Yeast
- French Saison (3711), Chimay, Farmhouse (3726), Saison (3724), Cherry Yeast, Scottish Ale Yeast
- Brett
- Drei, Crooked Stave (CMY-001), B. clausenii, B. bruxellensis, B. lambicus
- Bacteria
- L. brevis, L. delbrueckii, Pediococcus
I tasted the solera beer at the time I was moving it and it was very tasty! A nice round sourness and a whole lot of fruit in the nose. It was a light red color which I hope to darken up by adding darker beers in the future. In about 6 months I will take out 5 gallons and bottle it and freshen the barrel with new beer.
Wednesday, January 15, 2014
Yeast Cell Counting and Viabilty: Hemocytometer
Cell counting is one of the most important skills for a brewer. It allows a brewer to be able to pitch the correct number of cells into their wort. It also ensures that the cells are healthy and ready to make beer.
The most basic way for a brewer to count cells is to use a hemocytometer. This is a tool that was developed in the 1800's for counting blood cells. It just so happens that blood cells and yeast cells are about the same size. For this reason a hemocytometer can also be used for counting yeast cells.
The hemocytometer itself is a rather ingenious invention. It is simply a grid on a slide that holds a known volume of liquid. The volume inside of any one of the 9 large squares on the grid contains exactly one 10000th of a mL of liquid. To obtain the total cells in 1 mL of liquid you can count all the cells in that 10000th of a mL and multiply by 10,000 to come up with the cells in 1 mL of liquid.
In combination with counting cells they can also be stained for viability. Viability is how many cells in the population are alive. The number does not tell you how healthy the cells are, (there is another method called a Vitality Test that can be used to tell you how healthy the cells are) only if they are alive or dead. To stain the cells you can use a solution of 2% Methylene Blue, which is a dye that enters into all the yeast cells. The yeast cells that are still alive have an active enzyme that will break down the dye. Yeast cells that are dead have no active enzyme to break down the dye and soon accumulate it inside. This causes the living cells to appear unstained and the dead cells to stain a dark blue/black color. By counting dead and live cells a percentage of living cells can be obtained, this number is the viability of the culture.
Here is how both a cell count and a viability count are done.
Now that you know how many cells you have in your slurry you can calculate how much volume of your yeast slurry to add to your fermenter. I will be adding a post on how much yeast to add to your wort and will post a link here.
The most basic way for a brewer to count cells is to use a hemocytometer. This is a tool that was developed in the 1800's for counting blood cells. It just so happens that blood cells and yeast cells are about the same size. For this reason a hemocytometer can also be used for counting yeast cells.
The hemocytometer itself is a rather ingenious invention. It is simply a grid on a slide that holds a known volume of liquid. The volume inside of any one of the 9 large squares on the grid contains exactly one 10000th of a mL of liquid. To obtain the total cells in 1 mL of liquid you can count all the cells in that 10000th of a mL and multiply by 10,000 to come up with the cells in 1 mL of liquid.
In combination with counting cells they can also be stained for viability. Viability is how many cells in the population are alive. The number does not tell you how healthy the cells are, (there is another method called a Vitality Test that can be used to tell you how healthy the cells are) only if they are alive or dead. To stain the cells you can use a solution of 2% Methylene Blue, which is a dye that enters into all the yeast cells. The yeast cells that are still alive have an active enzyme that will break down the dye. Yeast cells that are dead have no active enzyme to break down the dye and soon accumulate it inside. This causes the living cells to appear unstained and the dead cells to stain a dark blue/black color. By counting dead and live cells a percentage of living cells can be obtained, this number is the viability of the culture.
Here is how both a cell count and a viability count are done.
![]() | ||
| Loading the Hemocytometer Photo 14:12, 13 November 2008 (UTC) by Jacopo Werthe |
- Take your yeast slurry or whatever sample you want to count.
- Mix the sample up very well, if the yeast are heavily concentrated you will need to dilute them in water (you can not count the cells if there are too many on the slide, aim for between 80-200 cells in the 5 counting squares).
- Take the diluted sample and add a few drops of methylene blue until the solution turns a medium blue color.
- Add about 15 uL of the sample to the hemocytometer slide using the sample loading notch.
- Count all of the cells in the boxes that are highlighted below (the 5 4x4 boxes that are located inside the large center square). Note that each of the boxes is rimmed by a triple line. Cells that are on the upper and right triple line should not be counted (they are considered out of bounds). Cells that are on the lower and left triple line should be counted as in bounds. If a cell is budding count it as two cells if the bud is greater than or equal in size to the mother cell. Count the budding cell as one cell if the bud is less than half the size of the mother cell.
- Take the number of cells you counted, multiply by 5 (because you counted only 5 of the 25 squares in the area), multiply by 10,000 (because your volume counted was a 10000th of a mL) and multiply by your dilution factor. If you diluted 1:20 and counted 89 cells the math would look like this...
- 89 x 5 x 10,000 x 20 = 89,000,000 or 8.9E7 cells/mL

The 5 cells to be counted are highlighted in blue.
Photo from http://dictybase.org/techniques/media/dicty_growth.html - To determine the viability count the number of living and dead cells in all 5 highlighted squares, then divide the living cells by the total number of counted cell. If you counted 86 living and 3 dead the math would look like this...
- 86/(86+3) = .966 or 96.6% viability.
![]() | |||
| Stained cells. |
Now that you know how many cells you have in your slurry you can calculate how much volume of your yeast slurry to add to your fermenter. I will be adding a post on how much yeast to add to your wort and will post a link here.
Tuesday, December 31, 2013
Christmas 2013 Porter (1923 Courage Stout)
For Christmas this year my Dad and I decided to brew up a beer to share with the family. He really likes the London Porter served by a local brewery and wanted to create something similar to share with family and friends. I spent quite a bit of time looking for a recipe or some style guidlines for what exactly makes a porter a "London Porter". I eventually turned to the blog "Shut up about Barclay Perkins", which has a wealth of information about British beer. I came across a recipe for 1932 Courage Stout and decided that it would be a great place to start. With a few modifications my Dad and I soon had a recipe.
The most challenging element to brewing this beer was the Black Invert Sugar. I poked around on the internet and found that you can create your own invert sugar using heat and acidity. Invert sugar is table sugar (succrose) which has been split apart into its two components, fructose and glucose. It tastes sweeter than table sugar, retains moisture better, and is less prone to crystallization. Hydrolysis (the addition of a water molecule) will cause succrose to break apart. In order to create our own invert sugar we catalyzed the hydrolysis reaction with heat and acid.
Invert Sugar Recipe
As we made the invert sugar we were also working on mashing and bringing the wort to a boil. The rest of the recipe was as follows (mostly copied from Barclay Perkins )
Christmas 2013 Porter (1923 Courage Stout)
5 Gallons
OG 1.044
FG 1.007

Grain
3 pounds Maris Otter
1.25 pounds Golden Promise
1.25 pounds Peark
0.75 pounds Black Malt
0.5 pounds Brown Malt
0.5 pounds Black Invert Sugar
Hops
17 IBUs Challenger at 90 minutes
12.2 IBUs Challenger at 30 minutes
Yeast: Yorkshire Ale, Ferment at 68 F
Primary for 2 weeks and then straight into a keg. Force carbonated to 1.8 Volumes of CO2.
Served at 55 F.
ABV 4.9% (Tested by Gas Chromotography)
Tasting Notes:
Beer pours full of tiny bubbles, looks just like a cask beer, strong tan head turns into a wonderful lacing around the glass. Jet black in color with no highlights.
Aromas of toast, coffee, chocolate, and a deep maltiness. No hop aroma, very well balanced.
Taste is smooth, chocolaty, and a little bitter roast bite at the finish. The beer is dry and has notes of coffee and toast. Roast increases as the beer warms.
Overall I am very pleased with this beer. It looks awesome coming out of the keg and it is a nice smooth drinker.
10/17/2014
I found a bottle of this beer in the basement. It was hidden in a box of bombers in the fridge and I stumbled upon it while looking for some old sour beers. I was pleasantly surprised to find the beer was still in great condition. Despite the low alcohol content everything tasted great. The coffee and chocolate flavors were a little subdued compared with the first tasting but the beer was still silky smooth.
The most challenging element to brewing this beer was the Black Invert Sugar. I poked around on the internet and found that you can create your own invert sugar using heat and acidity. Invert sugar is table sugar (succrose) which has been split apart into its two components, fructose and glucose. It tastes sweeter than table sugar, retains moisture better, and is less prone to crystallization. Hydrolysis (the addition of a water molecule) will cause succrose to break apart. In order to create our own invert sugar we catalyzed the hydrolysis reaction with heat and acid.Invert Sugar Recipe
- 1 pound Table Sugar
- 1.5 cups water
- 1 tsp lemon juice
As we made the invert sugar we were also working on mashing and bringing the wort to a boil. The rest of the recipe was as follows (mostly copied from Barclay Perkins )
Christmas 2013 Porter (1923 Courage Stout)
5 Gallons
OG 1.044
FG 1.007

Grain
3 pounds Maris Otter
1.25 pounds Golden Promise
1.25 pounds Peark
0.75 pounds Black Malt
0.5 pounds Brown Malt
0.5 pounds Black Invert Sugar
Hops
17 IBUs Challenger at 90 minutes
12.2 IBUs Challenger at 30 minutes
Yeast: Yorkshire Ale, Ferment at 68 F
Primary for 2 weeks and then straight into a keg. Force carbonated to 1.8 Volumes of CO2.
Served at 55 F.
ABV 4.9% (Tested by Gas Chromotography)
Tasting Notes:
Beer pours full of tiny bubbles, looks just like a cask beer, strong tan head turns into a wonderful lacing around the glass. Jet black in color with no highlights.
Aromas of toast, coffee, chocolate, and a deep maltiness. No hop aroma, very well balanced.
Taste is smooth, chocolaty, and a little bitter roast bite at the finish. The beer is dry and has notes of coffee and toast. Roast increases as the beer warms.
Overall I am very pleased with this beer. It looks awesome coming out of the keg and it is a nice smooth drinker.
10/17/2014
I found a bottle of this beer in the basement. It was hidden in a box of bombers in the fridge and I stumbled upon it while looking for some old sour beers. I was pleasantly surprised to find the beer was still in great condition. Despite the low alcohol content everything tasted great. The coffee and chocolate flavors were a little subdued compared with the first tasting but the beer was still silky smooth.
Sunday, October 27, 2013
Pumpkin Beer 2013
It is that time of year again. Pumpkins are starting to show up at the stores so that brewers like me can turn them into beer!
This year I followed the same recipe, almost, that I did last year. Despite knowing what I needed to do the brew day turned into quite a disaster. I decided to brew with my buddy Chase who just got hired as a brewer at Bristol. We also invited some of our co-workers from the Brewing Science Institute. This dream brewing team was unable to handle what was ahead of them.
Problems started when I showed up with not enough grain, I was about 4 pounds short. This was easily fixed by scaling back our 10 gallon batch to 8 gallons. As we pulled out the equipment that we needed for the day we found that it had been put away wet and dirty and was covered in mold. Before we could even start brewing we had to clean everything.
Things went from bad to worse when our roasted pumpkin turned our mash into cement. It took an extra hour and a lot of stirring to get what we needed out of the mash tun. When it became time to add hops we found that no one had any hop bags. We opted to go without, which was a terrible idea. When it came time to run the beer through the chiller all the hops immediately jammed the chiller which left us with 8 gallons of beer and no way to cool it.
I decided to cut me losses and take the beer home hot. I then placed it back on the stove, boiled it again for ten minutes, and then cooled it with my own chiller. Finally getting the beer into the carboy after an almost 8 hour brew day.
Despite all the disaster the beer turned out great. Here is the recipe and a review.
Recipe for 8 gallons of beer
OG 16 Plato
FG 3.5 Plato
IBU 27
ABV 7.5%
Grain
90% Marris Otter
10% Caramel 20
3 pound toasted pumpkin added to the mash tun
Hops
60 minutes 1 oz 13% AA Magnum
10 minutes 0.75 oz 6% AA Sterling
Spices
5 minutes from end of boil 1 3/4 tsp pumpkin pie spice
AT BOTTLING 2oz sugar (for carbonation)
AT BOTTLING 1/4 oz Vanilla
AT BOTTLING 1/2 tsp Pumpkin Pie Spice
Beer pours with a strong and sticky head. The foam turns into a lovely white lacing around the glass. The beer is orange-gold in color and is almost crystal clear. Small bubbles rise to the top of the beer from the nucleation site, excellent carbonation.
Aroma is a little sweet and filled with pumpkin pie spice. The spice is not overwhelming, it is clearly a beer that has been spiced to smell like pumpkin instead of a pumpkin pie bomb. It would be nice to have some caramel or grain notes to add some pie crust aroma.
The taste is excellent. Pumpkin pie spice is subtle and in the finish. The vanilla went a long way to smooth out the palate. The alcohol is not perceptible which is pretty impressive for the ABV.
Mouthfeel is smooth and full.
Overall this beer turned out very well, despite the rough start. It will be a great beer to share at Thanksgiving this year.
This year I followed the same recipe, almost, that I did last year. Despite knowing what I needed to do the brew day turned into quite a disaster. I decided to brew with my buddy Chase who just got hired as a brewer at Bristol. We also invited some of our co-workers from the Brewing Science Institute. This dream brewing team was unable to handle what was ahead of them.
Problems started when I showed up with not enough grain, I was about 4 pounds short. This was easily fixed by scaling back our 10 gallon batch to 8 gallons. As we pulled out the equipment that we needed for the day we found that it had been put away wet and dirty and was covered in mold. Before we could even start brewing we had to clean everything.
Things went from bad to worse when our roasted pumpkin turned our mash into cement. It took an extra hour and a lot of stirring to get what we needed out of the mash tun. When it became time to add hops we found that no one had any hop bags. We opted to go without, which was a terrible idea. When it came time to run the beer through the chiller all the hops immediately jammed the chiller which left us with 8 gallons of beer and no way to cool it.
I decided to cut me losses and take the beer home hot. I then placed it back on the stove, boiled it again for ten minutes, and then cooled it with my own chiller. Finally getting the beer into the carboy after an almost 8 hour brew day.
Despite all the disaster the beer turned out great. Here is the recipe and a review.
Recipe for 8 gallons of beer
OG 16 Plato
FG 3.5 Plato
IBU 27
ABV 7.5%
Grain
90% Marris Otter
10% Caramel 20
3 pound toasted pumpkin added to the mash tun
Hops
60 minutes 1 oz 13% AA Magnum
10 minutes 0.75 oz 6% AA Sterling
Spices
5 minutes from end of boil 1 3/4 tsp pumpkin pie spice
AT BOTTLING 2oz sugar (for carbonation)
AT BOTTLING 1/4 oz Vanilla
AT BOTTLING 1/2 tsp Pumpkin Pie Spice
Beer pours with a strong and sticky head. The foam turns into a lovely white lacing around the glass. The beer is orange-gold in color and is almost crystal clear. Small bubbles rise to the top of the beer from the nucleation site, excellent carbonation.
Aroma is a little sweet and filled with pumpkin pie spice. The spice is not overwhelming, it is clearly a beer that has been spiced to smell like pumpkin instead of a pumpkin pie bomb. It would be nice to have some caramel or grain notes to add some pie crust aroma.
The taste is excellent. Pumpkin pie spice is subtle and in the finish. The vanilla went a long way to smooth out the palate. The alcohol is not perceptible which is pretty impressive for the ABV.
Mouthfeel is smooth and full.
Overall this beer turned out very well, despite the rough start. It will be a great beer to share at Thanksgiving this year.
Saturday, August 10, 2013
Isolating Wild Yeast
I think any enthusiast in the hobby of home brewing at sometime or another becomes enchanted with the multitude of yeast strains that are available. Suppliers such as Wyeast, White Labs, and the Brewing Science Institute have hundreds of options (although not all of them are offered to home brewers). Despite the options from suppliers this is just the tip of the iceberg as far as yeast are concerned. Wild yeast live all around us on trees, fruit, and even in the stomachs of bugs. Who knows what unique and wonderful yeast could be waiting to be found. I recently set out to collect some of these "Wild Yeast". I thought I would share some of what I have learned and found.
Isolating Wild Yeast
This is the procedure that I have found works best for isolating Wild Yeast. I have mostly used this method to isolate yeast from wild beers (Cantillon and Drei Fontenien) but have also used it to collect yeast from barrels.
Isolating Wild Yeast
This is the procedure that I have found works best for isolating Wild Yeast. I have mostly used this method to isolate yeast from wild beers (Cantillon and Drei Fontenien) but have also used it to collect yeast from barrels.
- I take a small sample of the beer and add it to a container filled with sterilized low gravity wort that is made with a little bit of hops. This first step will make sure that any of the bugs (Yeast and Bacteria) are able to ferment wort and live in the increasing level of alcohol. This also works to kill or stop the growth of any bacteria that is present, which I am not really interested in (the hops should also help cut down on bacterial growth). I allow for 2 weeks of growth since some of these bugs are coming out of a bottle that has set for a while.
- I next take about 1 mL of the new culture from step 1 and place it on a large wort agar plate. This will give me the chance to grow up single colonies. I allow for 1 week of growth.
- Take any colonies that have grown on the first agar plate and transfer them to their own new wort agar plate and allow them to grow into separate single colonies. (You may notice that some of the colonies do not look similar, in which case you may have mutants).
- Next, take single colonies from the 2nd set of plates and grow them up in small (250 mL) wort samples. If the yeast is able to attenuate the wort in these samples they can be moved onto the final stage.
- Step up the cultures to about 1/2 gallon test batches. If you like the results you can save the yeast for further batches of beer.
Results
I have used the above method to collect a dozen separate wild yeast strains. Most of the time the yeast is pretty unremarkable and has little to no aroma that it produces. Other times the yeast does not attenuate well or take weeks to finish fermenting. However, I have found several strains that I like so far and will continue to look for other keepers. It is really rewarding to spend all the time isolating a strain and then get to figure out how best to use it!
Sunday, July 21, 2013
Citra Saison
I have finally been sucked in by the hype of Citra. A newer hop variety that claims to have tropical fruit aromas like pineapple, mango, and papaya. A friend and I decided to use the hop in a Saison to try to make a nice summery session beer. The results- I should have brewed alone so I didn't have to share the final product with anyone!
Recipe for 3 gallons
6.25 pounds 2-row base malt
1.33 pounds Munich
0.5 pounds wheat malt
0.25 pounds carapils
mashed at 152 F for 1 hour
sparged at 178
Added 0.4 oz of Challenger at 60 minutes
Added 0.5 oz of Citra at 10 minutes
Added 0.5 oz of Citra at 0 minutes
Original Gravity 1.065
Fermented with a blend of 3711 (French Saison) and 3724 (Farmhouse) [Blend was 10% 3711 90% 3724]
Fermented at ambient temp for 1 week, placed in secondary 2 weeks, bottled with table sugar
Final Gravity 1.008
Tasting
Beer pours a cloudy orange/yellow color with a good head that settles back into the glass. It can easily be revived with a swirl. The foam is very very sticky and forms a wonderful lace on the side of the glass.
Aroma is filled with tropical fruit notes, mostly dominated by pineapple but with hints of mango as well. There is also a nice spice from the 3711 that rounds out the nose nicely.
The beer taste like a saison, a little sweet and wheat/bread like to start with a wonderful phenolic and dry finish. The 3711 delivered the typical silky mouthfeel.
Overall this is a great success. The tropical fruit is overwhelming and continues to develop as the beer warms. The beer looks great and is so smooth and drinkable despite the 8+% ABV. This really turned out well and I will certainly be making a second batch.
Recipe for 3 gallons
6.25 pounds 2-row base malt
1.33 pounds Munich
0.5 pounds wheat malt
0.25 pounds carapils
mashed at 152 F for 1 hour
sparged at 178
Added 0.4 oz of Challenger at 60 minutes
Added 0.5 oz of Citra at 10 minutes
Added 0.5 oz of Citra at 0 minutes
Original Gravity 1.065
Fermented with a blend of 3711 (French Saison) and 3724 (Farmhouse) [Blend was 10% 3711 90% 3724]
Fermented at ambient temp for 1 week, placed in secondary 2 weeks, bottled with table sugar
Final Gravity 1.008
Tasting
Beer pours a cloudy orange/yellow color with a good head that settles back into the glass. It can easily be revived with a swirl. The foam is very very sticky and forms a wonderful lace on the side of the glass.
Aroma is filled with tropical fruit notes, mostly dominated by pineapple but with hints of mango as well. There is also a nice spice from the 3711 that rounds out the nose nicely.
The beer taste like a saison, a little sweet and wheat/bread like to start with a wonderful phenolic and dry finish. The 3711 delivered the typical silky mouthfeel.
Overall this is a great success. The tropical fruit is overwhelming and continues to develop as the beer warms. The beer looks great and is so smooth and drinkable despite the 8+% ABV. This really turned out well and I will certainly be making a second batch.
Sunday, June 9, 2013
Bavarian Hefeweizen
First, a little bit about wheat beers. Wheat beer (Weizen) is beer brewed with a portion of malted wheat replacing malted barley. Weizen can be split into a couple additional categories, Hefeweizen and Kristallweizen, along with styles like dunkelweizen and weizenbock. Kristallwezien is wheat beer that has been filtered to remove the yeast and any haze from the beer. Hefeweizen ("yeast wheat") is unfiltered Weizen that contains haze from the yeast.
To make matters even more complicated there are multiple forms of Kristallweizen and Hefeweizen. I will be writing today about just Hefeweizen, as it is the focus of this post. Hefeweizen in Germany can be sub-categorized by region, either North, Middle, or South (Bavarian). What sets these areas apart are the aromas of the Hefeweizen. In Northern Germany Hefeweizen most often shows clove like aroma along with nutmeg and other phenolics. In Bavaria banana esters are emphasized along with apple. While in central parts of Germany a Blanche is often seen between the two (clove and banana). While this is not a hard and fast rule it gives a good generalization of Hefeweizen in Germany.
The focus today is to make a Bavarian Hefeweizen (a banana bomb). To do that we need to create as much isoamylacetate (which smells like banana) as we can. There are several things we can manipulate to do this, (1) the yeast and (2) the grain bill.
Yeast:
To create as much isoamylacetate (banana) as possible we want to pick the correct yeast strain. In the example below I will be using a proprietary strain from the Brewing Science Institute. Your best bet to obtain this strain is to culture it from a growler of Prost beer. If you do not have this option available to you I would recommend Wyeast 3068.
Yeast produces isoamylacetate in response to stress. So in order to stress the yeast out you can do several things, under pitch and under aerate. You should pitch only 25 % of the cells you would normally use and only aerate half of what you normally do. These two factors in combination will produce a very banana like beer.
You also want to manipulate the fermentation temperature and ferment the beer at > 68 F.
Grain Bill:
Some of the precusors for the phenolic compound that smells like clove are created while mashing. In particular a step mash that has a rest at 111 F and 125 F produces ferulic acid which will result in an increase in clove in the finished beer. To prevent this and create more isoamlyacetate a single step mash to create a highly fermentable wort is suggested. I have also heard it recommended that 3 % glucose added to the boil will increase the level of isoamylacetate.
Using all of the above knowledge I decided to brew a simple Bavarian Hefeweizen.
I used a very simple grain bill with 50% malted wheat and 50% malted barley. I added a single hop addition for about 12 IBUs.
Bavarian Hefeweizen
OG: 1.046
FG 1.012
Grain Bill
50% Malted Wheat
50% Malted Barley
Single step mash at 148 F
60 minute addition of Hallertau for 12 IBUs
Propriertaty yeast strain at <8 million cells/mL
Fermented 70 F
Tasting:
Apperance: The beer is straw yellow with an intense and sticky head. A little cloudy from the yeast but not too much.
Aroma: The beer is a banana bomb, I also detect a little bubblegum and some wheat aromas.
Taste: Wheat beer! Very simple, a little bit on the sweet side but very very drinkable.
Overall: This was a great success. I was able to produce loads of isoamylacetate and create an incredible refreshing wheat beer.
To make matters even more complicated there are multiple forms of Kristallweizen and Hefeweizen. I will be writing today about just Hefeweizen, as it is the focus of this post. Hefeweizen in Germany can be sub-categorized by region, either North, Middle, or South (Bavarian). What sets these areas apart are the aromas of the Hefeweizen. In Northern Germany Hefeweizen most often shows clove like aroma along with nutmeg and other phenolics. In Bavaria banana esters are emphasized along with apple. While in central parts of Germany a Blanche is often seen between the two (clove and banana). While this is not a hard and fast rule it gives a good generalization of Hefeweizen in Germany.
The focus today is to make a Bavarian Hefeweizen (a banana bomb). To do that we need to create as much isoamylacetate (which smells like banana) as we can. There are several things we can manipulate to do this, (1) the yeast and (2) the grain bill.
Yeast:
To create as much isoamylacetate (banana) as possible we want to pick the correct yeast strain. In the example below I will be using a proprietary strain from the Brewing Science Institute. Your best bet to obtain this strain is to culture it from a growler of Prost beer. If you do not have this option available to you I would recommend Wyeast 3068.
Yeast produces isoamylacetate in response to stress. So in order to stress the yeast out you can do several things, under pitch and under aerate. You should pitch only 25 % of the cells you would normally use and only aerate half of what you normally do. These two factors in combination will produce a very banana like beer.
You also want to manipulate the fermentation temperature and ferment the beer at > 68 F.
Grain Bill:
Some of the precusors for the phenolic compound that smells like clove are created while mashing. In particular a step mash that has a rest at 111 F and 125 F produces ferulic acid which will result in an increase in clove in the finished beer. To prevent this and create more isoamlyacetate a single step mash to create a highly fermentable wort is suggested. I have also heard it recommended that 3 % glucose added to the boil will increase the level of isoamylacetate.
Using all of the above knowledge I decided to brew a simple Bavarian Hefeweizen.
I used a very simple grain bill with 50% malted wheat and 50% malted barley. I added a single hop addition for about 12 IBUs.
Bavarian Hefeweizen
OG: 1.046
FG 1.012
Grain Bill
50% Malted Wheat
50% Malted Barley
Single step mash at 148 F
60 minute addition of Hallertau for 12 IBUs
Propriertaty yeast strain at <8 million cells/mL
Fermented 70 F
Tasting:
Aroma: The beer is a banana bomb, I also detect a little bubblegum and some wheat aromas.
Taste: Wheat beer! Very simple, a little bit on the sweet side but very very drinkable.
Overall: This was a great success. I was able to produce loads of isoamylacetate and create an incredible refreshing wheat beer.
Monday, May 6, 2013
Wild Brewing: Savage Tasting
For anyone who has been following what is going on I recently completed 4 barrel aged sour beers with the help of two friends. The barrels are all bottled and I will be posting tastings of them one by one. Here is the recipe for the first beer, code name Savage.
Savage:
Beer pours a slightly hazy golden color with a thin head
that becomes a lacing on the glass. The golden hues of the beer make it appear
very refreshing and go to show how simple the original recipe for this beer
was.
Aroma is very crsip,
the first thing that hits you is sour and funk balanced on the side of
lactic acid. There is a little bit of barnyard but it is very subtle and helps
to support a roundness in the aroma.
There is a hint of lemon or of lemon grass at the finish of the beer.
Flavor: The beer is sour. The first thing that hits you is a
lemon like sourness, the middle is bright and warming, with a sour puckering
finish. There are not a lot of individual flavors throughout but the sourness
really makes the beer refreshing.
Mouthfeel: The beer is very crisp, medium in body. The sour
really cleans the palate.
Overall: The beer is a great example of what a sour beer
should be. The beer is tart without being harsh or vinegar like. The sourness
is very bright and plays well with how light the beer is in color. A perfect
display of sourness in a beer.
Saturday, April 20, 2013
Spring Time in the Rockies!
Bottling Sour Beer:
I have now used this method for 5 batches of beer and it has
worked out very well each time. I would like to note that the beer that I use
this for is almost completely flat and has no fermentable sugars left. I use
freshly cultured champagne yeast because it is both acid and alcohol tolerant.
It may produce a tiny amount of fruity aroma but I have not noticed it in the
bottles. For 5 gallons I dissolve 3.5 ounces of table sugar in 1 cup of water
and bring it to a boil. I then add the sugar water to the bottling bucket along
with about 5 milliliters of Champagne yeast slurry (the slurry is fairly
liquid). After a quick and gentle stir it is ready to bottle!
Subscribe to:
Posts (Atom)